How to Document Your Home for Insurance BEFORE a Storm Hits (The Smart Way)
Storm season in Florida isn’t just a date on the calendar — it’s a way of life. Every year, homeowners across Central Florida brace for strong winds, heavy rain, and the possibility of real property damage. And while you can’t control the weather, you can control how prepared you are before a storm ever touches your home.
One of the smartest steps you can take is documenting your property ahead of time. Good documentation doesn’t just help with peace of mind — it can be the difference between a fair insurance payout and a denied or underpaid claim.
The truth is simple:
Insurance companies require proof — and the better your proof, the stronger your claim.
This guide walks Orlando homeowners through the practical, smart, and easy steps to properly document your home before a major storm hits.
Why Documenting Your Home Matters
Most homeowners don’t think about insurance until something goes wrong. But after a storm, it’s common for insurers to say things like:
-
“We don’t see enough damage.”
-
“This looks like wear and tear.”
-
“There’s no proof this happened during the storm.”
-
“These items weren’t documented previously.”
The burden of proof is almost always on the homeowner.
Documenting your home beforehand gives you solid evidence of the home’s condition before the storm, which makes it harder for an insurer to minimize or deny your claim later.
Good documentation helps you:
-
Show the condition of your roof, interior, and exterior before damage occurred
-
Prove ownership and value of your belongings
-
Speed up the claims process
-
Reduce arguments with the insurance company
-
Get a fairer and more accurate payout
Think of it like creating a “before” snapshot — so if you ever need it, you can easily prove the “after.”
Step 1: Create a Home Inventory (The Simple Way)
A home inventory doesn’t need to be complicated or time-consuming. You’re not building a catalog for a museum — you’re just creating a record of what you own.
Here’s the easiest approach:
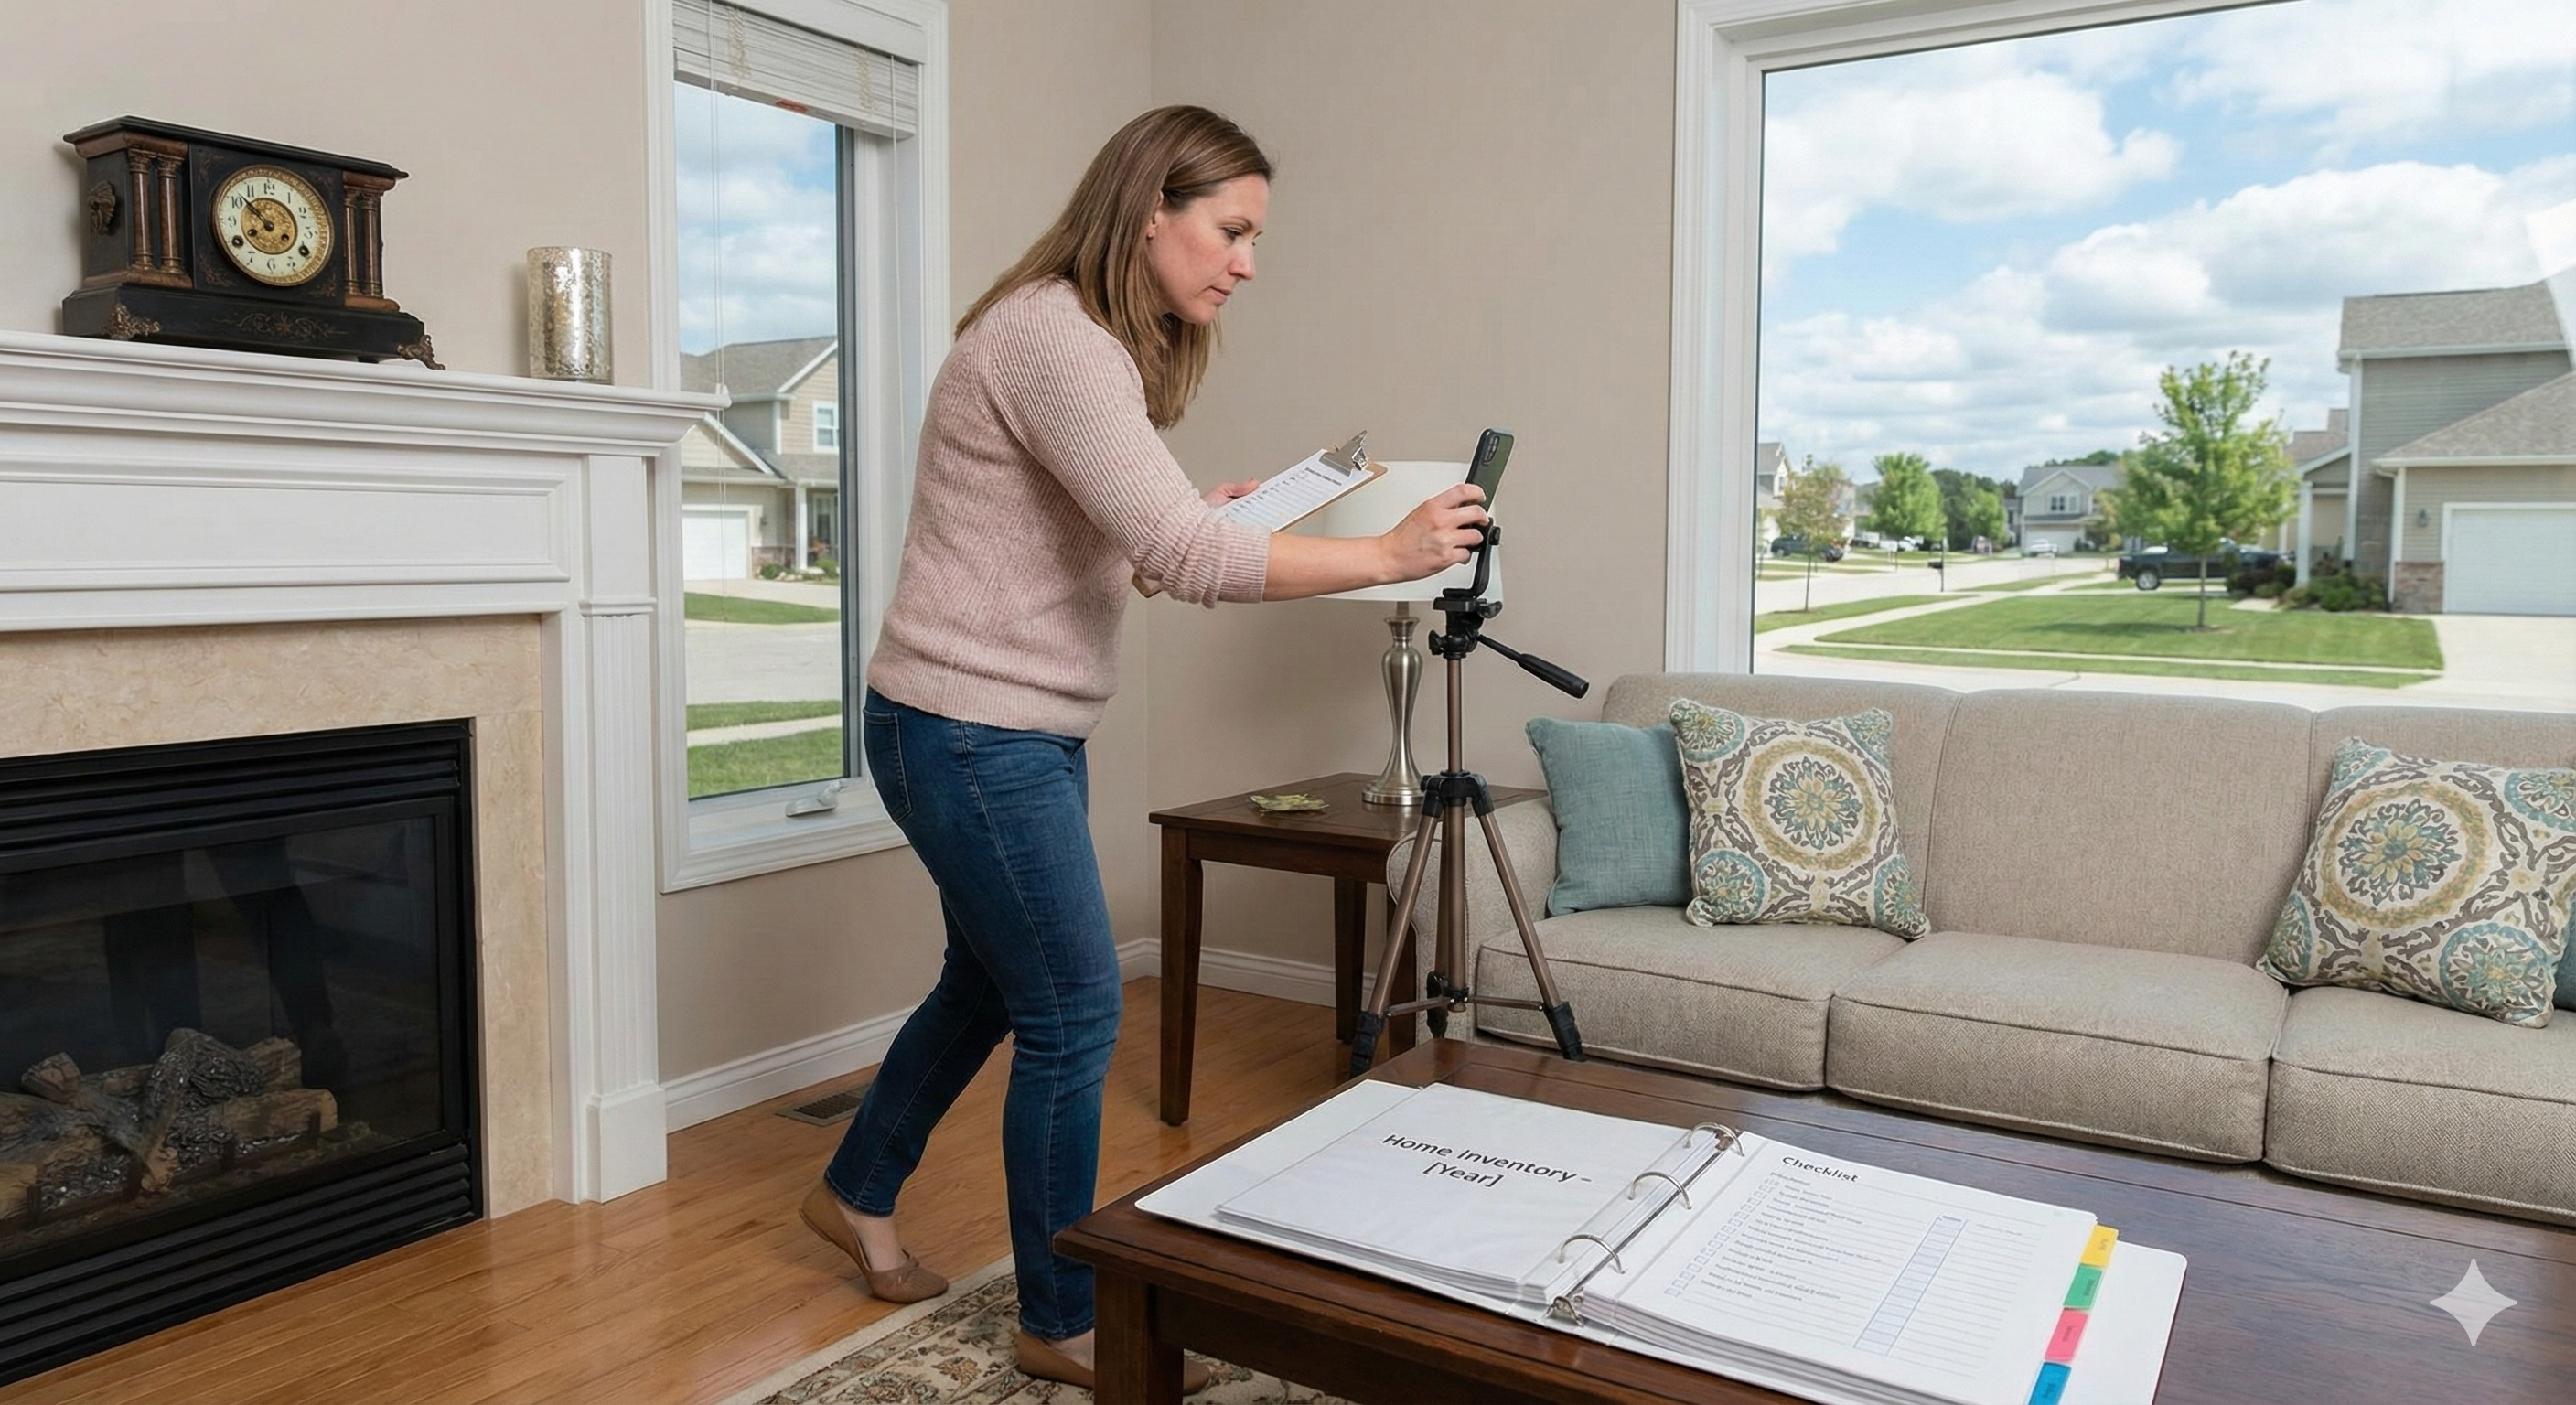
Walk-and-record method
Grab your smartphone, open the camera, and walk room by room doing a slow video sweep. While recording, talk through what you’re seeing, for example:
-
“This is the living room. Samsung 65-inch TV, purchased in 2023.”
-
“Kitchen appliances: Whirlpool fridge, LG dishwasher, granite countertops.”
-
“Master bedroom furniture: Solid wood bed frame, two nightstands, dresser.”
This creates visual and verbal proof at the same time.
Take close-up photos of high-value items
Snap photos of things like:
-
Electronics
-
Jewelry (if covered under your policy)
-
Tools
-
Musical instruments
-
Artwork
-
Designer furniture
-
Collectibles
If you still have receipts or warranties, place the item next to the document and take a picture.
Document serial numbers
Many electronics and appliances have serial numbers printed on the back or underside. Take quick photos — this is incredibly helpful during a contents claim.
Step 2: Document the Exterior of Your Home
Wind and roof damage are among the most common storm-related claims in Florida. That means your insurer will look closely at the pre-storm condition of your:
-
Roof
-
Siding / stucco
-
Exterior paint
-
Windows and screens
-
Doors
-
Gutters
-
Fencing
-
Decks and patios
-
Driveway and walkways
-
Pool area
How to document the exterior effectively:
1. Take clear photos of every side of your home
Stand far enough away to capture entire walls and the roofline.
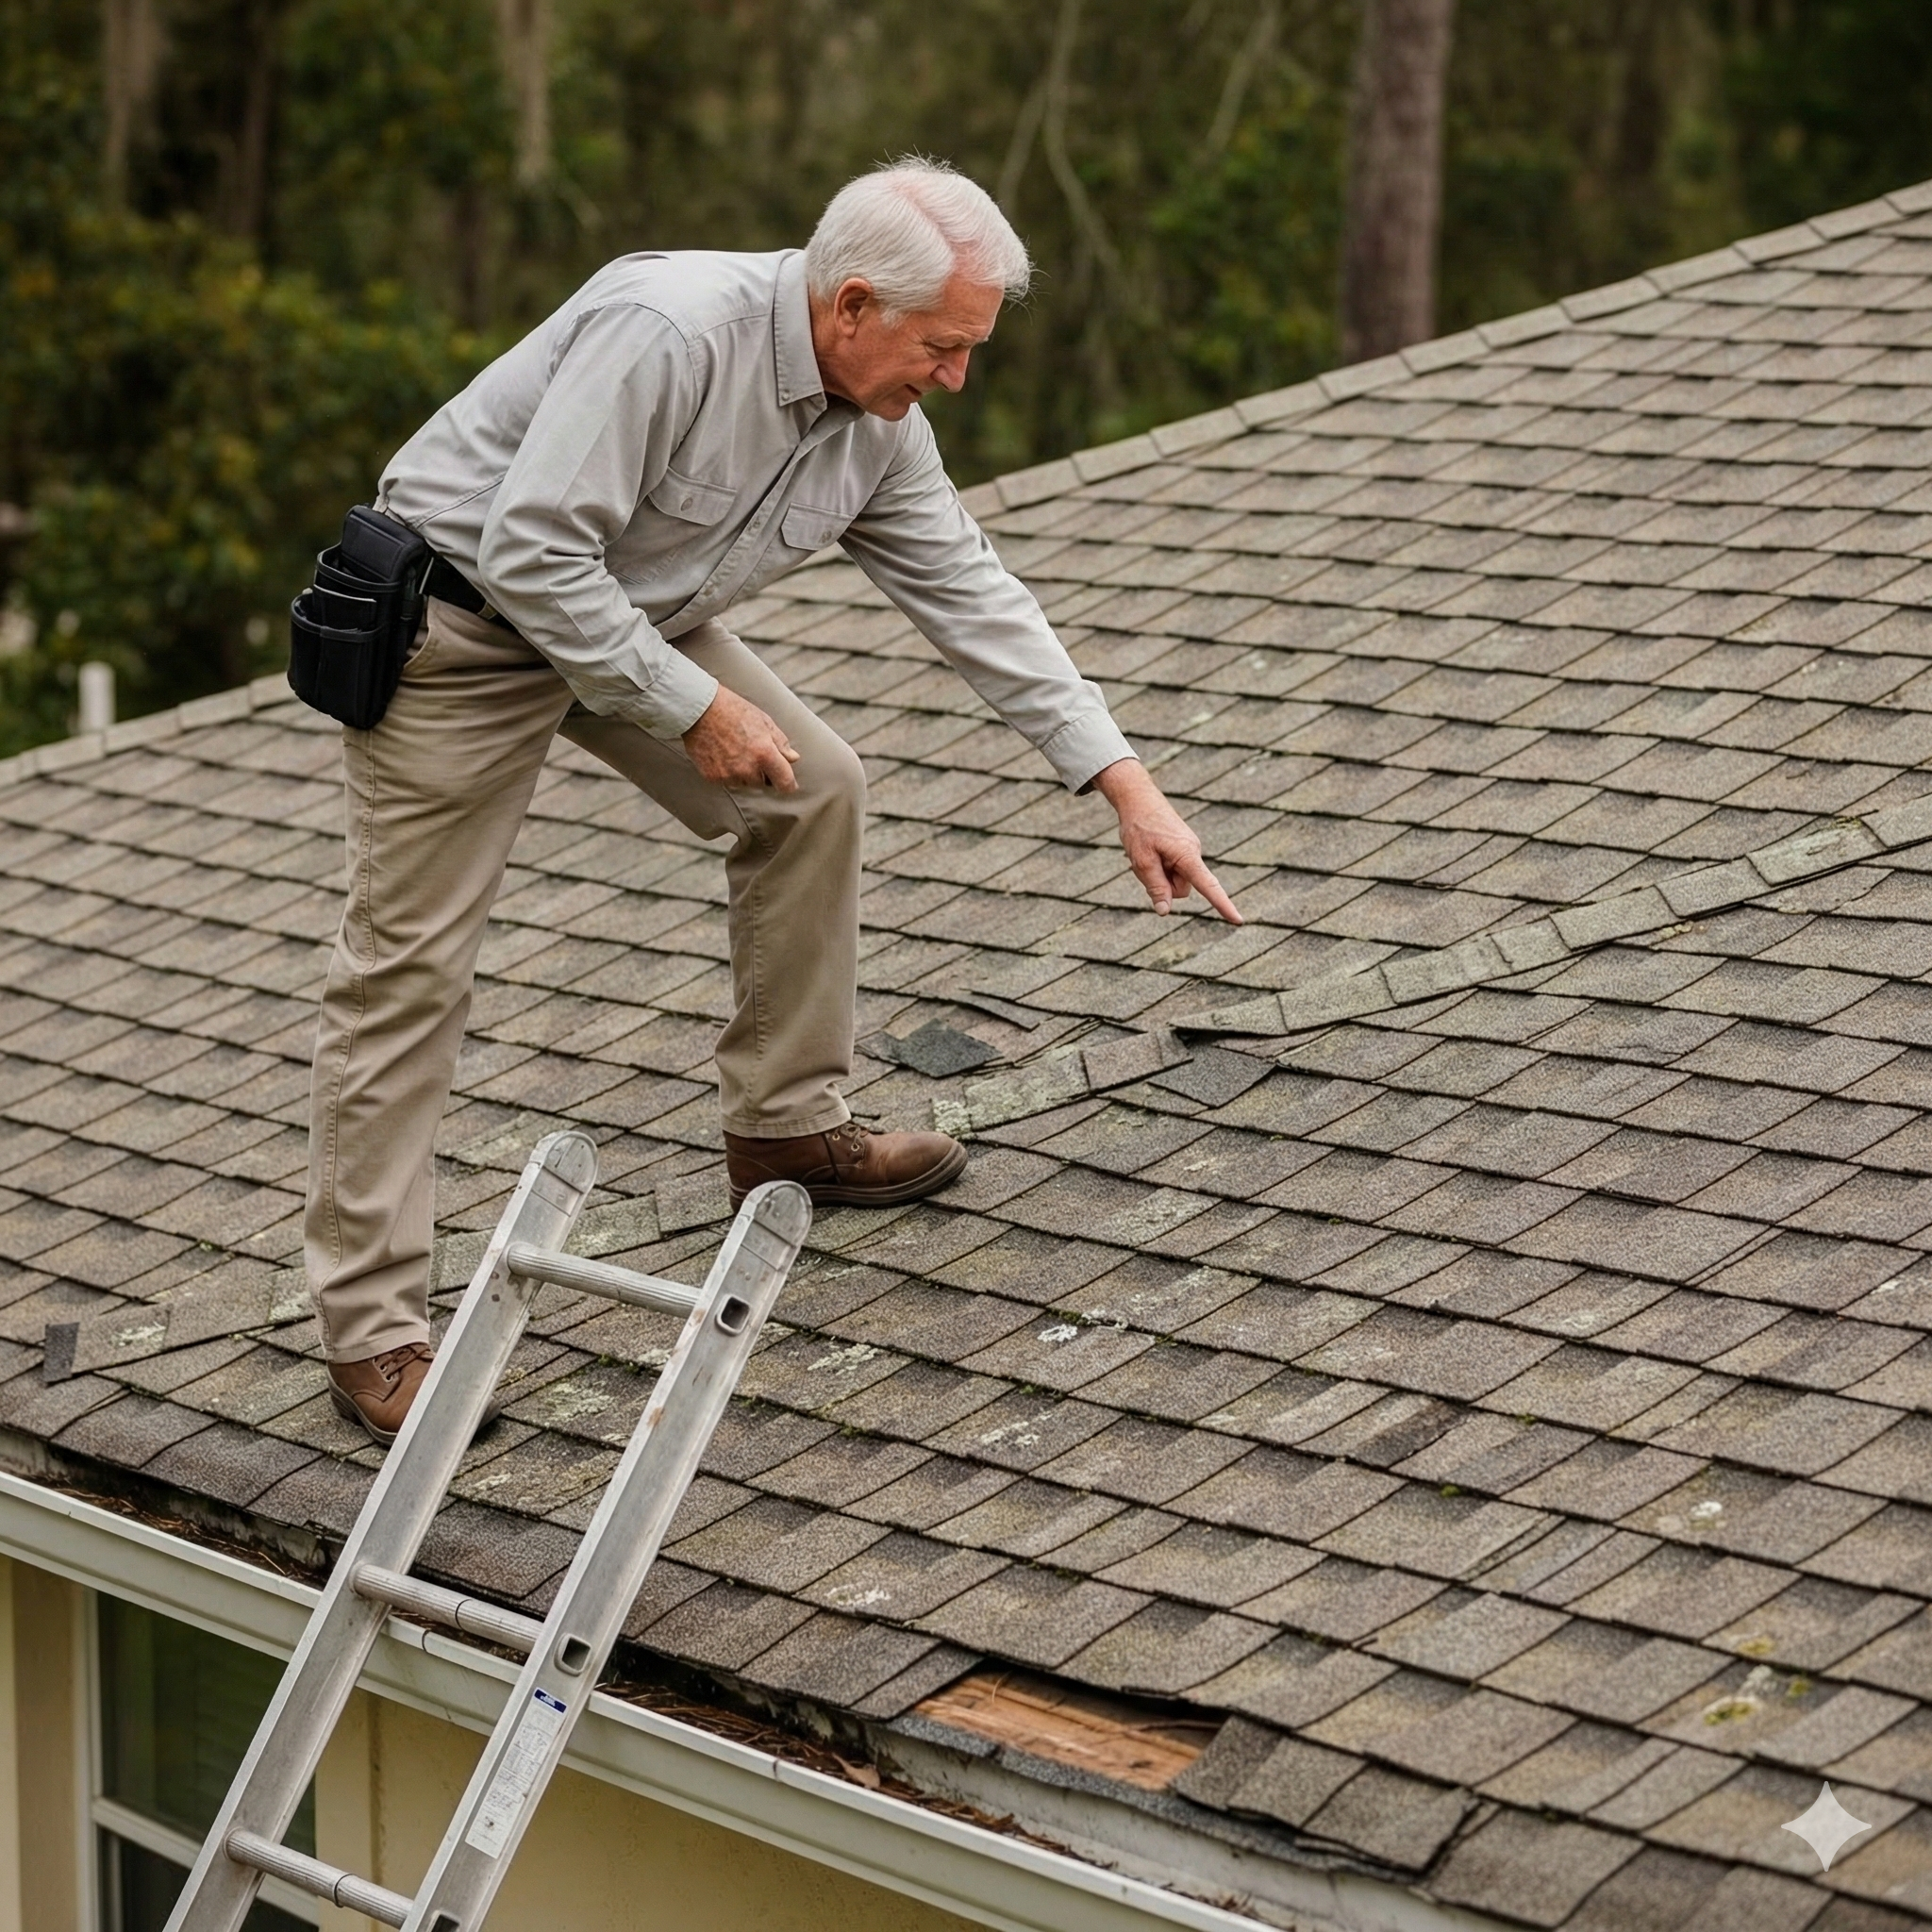
2. Photograph your roof if it’s safely possible
You don’t need to climb on the roof. Most smartphones can zoom well enough from the ground.
Capture:
-
Shingles
-
Flashings
-
Gutters
-
Ridge caps
-
Chimney (if you have one)
-
Skylights
-
Solar panels
3. Document known “problem areas”
Even if something looks minor — like a slightly lifted shingle — document it. Minor pre-existing issues won’t hurt your claim; they simply establish honesty and clarity.
4. Record your outdoor structures
Don’t forget:
-
Sheds
-
Screen enclosures
-
Pergolas
-
Detached garages
-
Pool equipment
-
Fences (especially vinyl or wood)
Insurance companies frequently dispute damage to these items, so photos matter.
Step 3: Document the Interior of Your Home
Even storms that cause only minor exterior damage can lead to major interior damage — especially from water intrusion.
Take photos of areas most prone to leaks:
-
Ceilings
-
Corners of window frames
-
Sliding glass doors
-
Around plumbing fixtures
-
Under sinks
-
Attic access areas
-
Around your water heater
-
AC closet or air handler
Why this matters:
After a storm, if you report water damage, the insurer may argue it came from a pre-existing leak. Your documentation shows otherwise.
Take pictures of:
-
Dry ceilings
-
Intact paint
-
No bubbling or water staining
-
No warped flooring
-
Dry baseboards
Even “boring” photos are valuable — they prove everything was in good condition before the storm.
Step 4: Organize Your Photos and Videos
It doesn’t need to be complicated, but organization helps when you need things quickly.
Best ways to store your documentation:
✔️ Cloud storage (recommended)
-
Google Drive
-
iCloud
-
Dropbox
-
OneDrive
Create a folder named “Home Documentation – [Year]” and subfolders such as:
-
Exterior
-
Roof
-
Interior
-
Garage
-
Home Inventory
-
Appliances
-
Electronics
✔️ Physical backup
Store printed photos or receipts in a waterproof folder. Not required, but helpful.
✔️ Email backup
Email the folder to yourself with a subject line like:
“Home Inventory & Pre-Storm Documentation – [Your Address] – [Year]”
Even if your phone is lost or destroyed, the documentation survives.
Step 5: Review Your Insurance Policy While You Document
Most homeowners haven't read their policy (and you're not alone).
While documenting, take 10 minutes to check:
✔️ Your deductible
Hurricane deductibles are often much higher than you think.
✔️ Whether you have Replacement Cost Value (RCV) or Actual Cash Value (ACV)
This affects how much you get paid.
✔️ Coverage limits for personal belongings
You may need endorsements for jewelry, tools, electronics, or collectibles.
✔️ Exclusions you should be aware of
Especially wear-and-tear, interior water damage, and certain roof conditions.
If anything is confusing — it usually is — a public adjuster can help break it down clearly.
Step 6: Re-Document Your Home Every Year
Storm season happens every year. So should your documentation.
The best time?
Anytime between January and June, before storm season begins.
Why yearly updates matter:
-
You might have replaced appliances
-
Furniture may have changed
-
Renovations may have been completed
-
Your roof or exterior may have been updated
-
Last year’s photos may not fully reflect the home’s current condition
A simple 20–30 minute walkthrough each year is more than enough.
Step 7: Know When to Call a Public Adjuster
Even with great documentation, dealing with insurance companies can be frustrating. A public adjuster:
-
Represents you — not the insurance company
-
Helps gather documentation
-
Understands exclusions and policy wording
-
Knows how to properly evaluate damage
-
Negotiates for a fair settlement
-
Prevents common insurance company tactics that reduce payouts
When in doubt, a public adjuster can review your situation for free to determine whether your claim needs expert help.
Final Thoughts
Documenting your home before a storm is one of the simplest and smartest ways to protect yourself. It only takes a little time, but it can save you thousands of dollars — and countless hours of stress — after a storm damages your property.
And if a storm does hit and you need help navigating the claim, NeJame Claims Adjusting is here to guide you every step of the way.
Prepared homeowners get better outcomes.
And documenting your home before a storm is the smartest way to stay prepared.